Minor Rips & Tears
Do not take the condition of your glider lightly! First inspect
your glider to assess what damage has been done.
How was the glider damaged? If you crashed into a tree, the entire
glider must be inspected. It would be best to send it to a professional.
If you deflated it on to a sharp post the damage is probably limited
to that area.
Inspect the glider inside and out. Look for damage to the load
ribs, attachment points and reinforcements. See if the seams are
damaged. Also, check the lines for breakage or damage.
IF YOU HAVE ANY DOUBTS ABOUT YOUR GLIDER GET PROFESSIONAL HELP!
If you are sure that there is only a small tear, in the middle
of a panel, no longer than two inches, you can repair the rip with
repair tape. (Repair tape for gliders can be bought from your local
paraglider school or kite store, repair tape from camping stores
are very heavy and not suitable for gliders.)
Slide a hard cover book into the glider under the tear. This will
give you a smooth flat surface to work on.

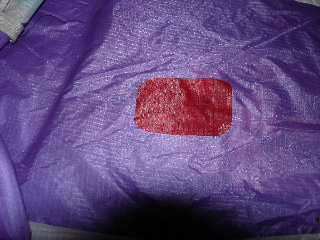
Prepare your tape. Cut a piece with plenty of over lap and round
the corners.

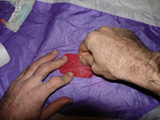
Smooth the fabric of the glider, peal the backing off of the tape
as you smoothly lay the tape over the tear.
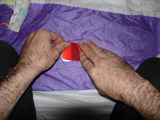
Burnish the tape firmly with the back of your finger nail.
NOT DONE YET!
Tape the inside of the glider also. Off set the inside patch by
a quarter of an inch. The reason you off set the inside patch is
so that there is a softer transition from the patch to the glider.
This keeps the fabric from bending, and therefore weakening, at
the edge of the patch.
Note: You will want to try to match the color better than I did.
(This is hopeless as your glider will have faded, sorry.) I used
contrasting colors to make the example clear.

More articles...
|